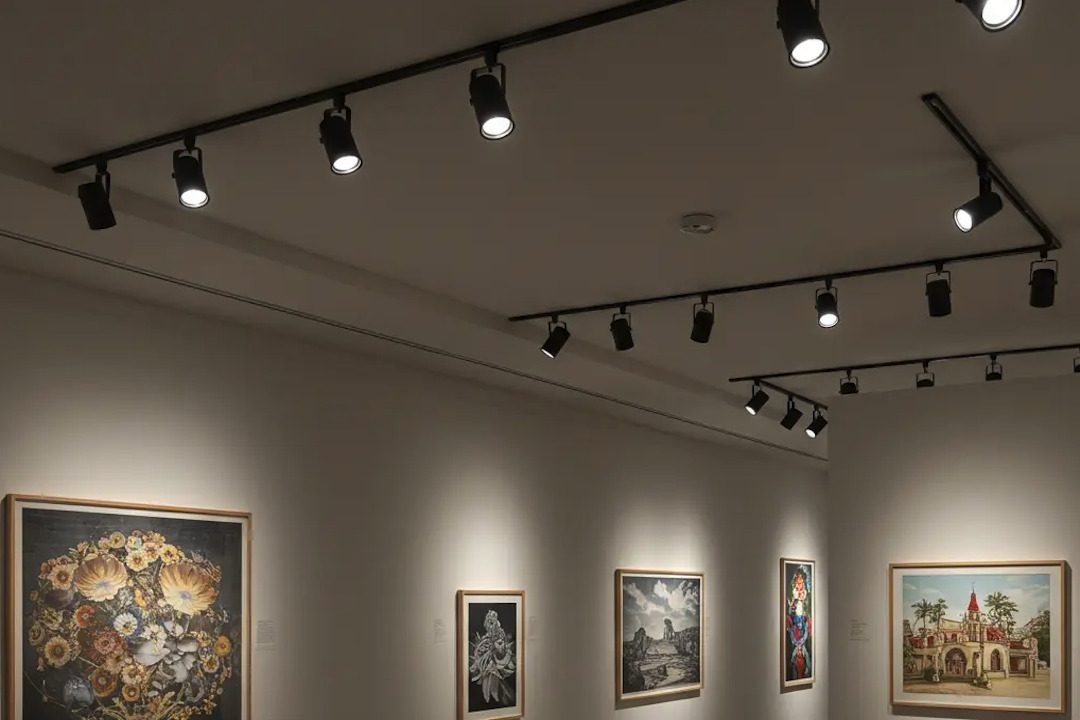
So, you’ve got this awesome gallery wall, right? All your favorite art, photos, and maybe even a few quirky personal touches. It looks great, but let’s be honest, sometimes it feels a little… flat. You want your pieces to pop, to really grab attention. The quickest and most effective way to do that? Adjustable track lights. They’re like spotlights for your art, letting you direct light exactly where it needs to go, making all the difference in how your cherished items are perceived.
You might be wondering, “Why track lights specifically?” Good question. There are lots of lighting Uselu options out there, but track lighting offers a unique combination of flexibility and control that’s just perfect for a dynamic display like a gallery wall.
Unparalleled Flexibility
Think about it: gallery walls evolve. You buy new art, re-arrange old pieces, or even change the entire theme. With fixed lighting, you’re stuck.
Easy Repositioning
Imagine you hang a new, larger piece. If your lights are recessed cans or sconces, they’re staying put. But with track lights, you simply slide the heads along the track to illuminate your new arrangement. No rewiring, no patching holes. It’s truly a game-changer for evolving decor.
Directing the Beam
Each light head can be aimed independently. Want a spotlight effect on that small, intricate drawing? Done. Need to evenly wash a larger canvas? Adjust a few heads accordingly. This level of precision is hard to beat.
The Power of Layered Lighting
Track lighting contributes beautifully to a layered lighting scheme. You’re not just relying on ambient light anymore; you’re adding functional and accent lighting.
Enhancing Visual Interest
By highlighting your art, you create focal points. This draws the eye, adds depth to the room, and prevents your gallery wall from looking like a flat collection of objects. It transforms it into an intentional display.
Controlling Mood and Atmosphere
Lighting deeply impacts the feel of a room. With adjustable track lights, you can create a dramatic, gallery-like atmosphere for an evening gathering, or a softer, more inviting glow for everyday enjoyment.
Choosing the Right Track System
Now that you’re convinced track lights are the way to go, let’s talk about the different types of track systems. It’s not one-size-fits-all, and picking the right one makes a difference.
H, J, and L Tracks: Understanding the Standards
These designations refer to the electrical connectors and internal wiring of the track and fixtures. The good news is they’re fairly standard, but mixing and matching isn’t usually an option.
H-Track (Halogen/Standard)
This is a widely available, older standard. It’s often found in residential and commercial settings. You’ll find plenty of fixture options, but sometimes they can be a bit bulkier.
J-Track (Juno Compatible)
Another common type, particularly popular in residential applications. It’s known for its relatively slim profile and good selection of modern fixtures. If you’re starting fresh, J-Track is often a solid choice.
L-Track (Lightolier Compatible)
While less common than H or J for new installations, L-Track still exists, especially in older homes or commercial spaces. Always double-check compatibility if you’re adding to an existing system.
Single-Circuit vs. Multi-Circuit Tracks
This is an important distinction, especially if you want more control over your lighting.
Single-Circuit: Simplicity Reigns
Most residential track lighting is single-circuit. This means all the light heads on that track are controlled by one switch. It’s straightforward and perfectly fine for many gallery walls where you want all your art lit at once.
Multi-Circuit: Advanced Control
If you have a very long track, or you want to be able to turn on specific groups of lights independently (e.g., only illuminate three pieces, or turn on every other light), then a multi-circuit track is what you need. This allows you to have different “zones” on the same track, controlled by separate switches. It’s a bit more complex to install and generally more expensive, but offers unparalleled flexibility for large or sophisticated setups.
Selecting the Perfect Track Heads
The track itself is just the skeleton. The track heads are where the magic happens, casting light directly onto your masterpieces.
Beam Spread: Spot vs. Flood
This refers to how wide the light beam is. It’s crucial for achieving the right effect.
Narrow Beam (Spot)
Ideal for highlighting small, individual pieces of art or adding dramatic emphasis. A narrow beam will create a defined circle of light, drawing the eye precisely where you want it. This works well for sculptures, small photography, or delicate drawings.
Medium Beam (Flood)
A more versatile option for general accent lighting. It provides a wider wash of light, suitable for larger canvases or groups of smaller works. If you’re unsure, a medium beam is often a safe bet as it offers good coverage without too much spill.
Wide Beam (Wash)
Best for evenly illuminating a large section of a wall or a very large piece of art. This creates a softer, less dramatic effect, ensuring the entire surface is lit without harsh shadows. Avoid using a wide beam to highlight small, intricate pieces, as it can diminish their impact.
Color Temperature: Setting the Mood
Color temperature, measured in Kelvins (K), dictates whether the light appears warm (yellowish) or cool (bluish-white). This has a massive impact on how your art looks.
Warm White (2700K-3000K)
This is often preferred for homes, bringing out the warmth in colors and creating a cozy, inviting atmosphere. It works beautifully with traditional art, portraits, and pieces with warm color palettes. It’s generally a safe and popular choice for residential gallery walls.
Cool White (3500K-4000K)
Brighter and more neutral, cool white can make colors appear more vibrant and accurate, especially blues and greens. It’s often chosen for modern art, black and white photography, or pieces where color accuracy is paramount. However, too cool can feel sterile, so tread carefully.
Daylight (5000K+)
Mimics natural daylight. This is typically reserved for studios or commercial galleries where extreme color accuracy is essential. For most homes, it might feel too harsh and unnatural.
CRI (Color Rendering Index): True Colors Shine
CRI measures how accurately a light source reveals the true colors of an object compared to natural light. For art, a high CRI is paramount.
Why High CRI Matters for Art
A low CRI light will distort colors, making your vibrant blues look muddy or your rich reds appear dull. You want your art to look as the artist intended. Aim for a CRI of 90 or higher for art lighting. This ensures your artwork’s true colors are accurately represented.
Dimmability: Control at Your Fingertips
Always, always choose dimmable track heads and ensure your dimmer switch is compatible.
Adjusting Intensity
Being able to dim your lights allows you to fine-tune the illumination level for different times of day, different moods, or even different art pieces. Sometimes a subtle glow is all you need, other times you want full brightness. Dimmability offers that flexibility.
Installation Tips & Common Considerations
Putting up track lighting isn’t overly complicated, but a little planning goes a long way.
Placement is Key
Where you install your track makes a huge difference.
Distance from the Wall
Generally, track lighting is mounted on the ceiling, anywhere from 1.5 to 3 feet from the wall with your gallery. The exact distance depends on the height of your ceiling, the size of your art, and the beam spread of your chosen fixtures. Experiment with holding a light up to see the effect before drilling. Too close, and you’ll get harsh shadows and spill onto the ceiling; too far, and the light won’t reach your lower pieces effectively.
Track Length and Configuration
Measure your wall carefully. You want the track to extend roughly over the entire length of your gallery wall, or at least the main sections. Tracks can be cut to size, or you can use connectors to create longer runs or even L or U shapes for corners. Don’t be afraid to connect multiple tracks if your gallery wall is extensive.
Powering Your Track Lights
You’ll need an electrical box to power your track.
Existing Junction Box
If you have an existing ceiling light fixture, you can usually remove it and use that junction box to power your track. This is often the easiest route for DIYers.
New Wiring (Pro Territory)
If there’s no existing power where you want your track, you’ll need to run new wiring. Unless you’re very comfortable with electrical work, this is best left to a qualified electrician. Safety first!
DIY vs. Professional Installation
This largely depends on your skill level and confidence.
When to DIY
If you’re replacing an existing fixture, or simply mounting a track to a ceiling with accessible wiring, and you’re comfortable with basic electrical work (turning off the breaker!), then DIY is certainly feasible. Most track systems come with clear instructions.
When to Call a Pro
If you need new wiring run, have complex configurations, or are just generally uncomfortable with electrical, hiring a licensed electrician is always the safest and most reliable option. They’ll ensure everything is up to code and working correctly.
The Art of Aiming Your Lights
Once everything is installed, the real fun begins: aiming your track heads to perfectly illuminate your art. This isn’t just pointing and shooting; it’s an art in itself.
The 30-Degree Rule of Thumb
A common guideline is to aim the light at a 30-degree angle to the artwork. This minimizes glare and ensures an even spread of light across the piece.
Avoiding Glare
Aiming too directly at the art (especially if it’s under glass) will cause reflective glare, making it hard to see the piece. Experiment with the angle until you find the sweet spot where the art is bright but you don’t see the light source reflecting back at you.
Even Illumination
The 30-degree rule generally helps to illuminate the entire surface of the artwork without creating harsh hotspots or shadows. For very textured or three-dimensional pieces, you might want to adjust this slightly to play up the textures.
Layering Light for Depth
Don’t be afraid to use multiple track heads on a single piece if needed.
Highlighting Key Features
For larger or more complex artworks, you might use one head for overall illumination and another, narrower beam to highlight a specific detail or section. This adds depth and intrigue.
Sculptural Impact
For 3D art or sculptures on your gallery wall (think wall-mounted ceramics or small shelves), using two lights from different angles can create dramatic shadows and really emphasize their form.
Adjust, Observe, Refine
This isn’t a “set it and forget it” process.
Step Back and Evaluate
Once you’ve aimed your lights, step back – way back – and look at your gallery wall from different angles in the room. Does anything look off? Are there shadows you don’t want? Is one piece overpowering another?
Experiment with Angles and Intensity
Play around with the angle of each light. Dim them slightly, then bring them up. You’ll be surprised how small adjustments can make a big difference in how your art is perceived and how the overall room feels.
Maintenance and Longevity
Track lights, like anything else, need a little TLC to keep them performing their best.
Regular Cleaning
Dust is the enemy of light.
Wiping Down Fixtures
Every so often, gently wipe down the track and the light heads with a soft, dry or slightly damp cloth. Dust buildup can dim the light output and even create fire hazards over time if it gets into the electrical components.
Cleaning the Bulbs
If you can safely reach them, gently wipe down the surface of the bulbs or LED modules as well. A thin layer of dust on the light source itself can significantly reduce its effectiveness.
Bulb/LED Replacement
Knowing when and how to replace your light sources is important.
LED Lifespan
One of the big advantages of LED track lights is their incredibly long lifespan. You might not need to replace them for years, or even decades! However, if one fails prematurely, it’s usually a simple twist or clip to replace the fixture or module.
Halogen/Incandescent Replacement (Less Common)
If you’re using an older track system with halogen or incandescent bulbs, you’ll be replacing them more frequently. Always allow them to cool down before handling, and use a cloth or glove to avoid skin oils transferring to the bulb, which can shorten its life.
Troubleshooting Common Issues
Sometimes things go wrong. Here are a few quick checks.
Lights Not Turning On
- Check the switch: Is it on?
- Check the breaker: Has it tripped?
- Check the bulb/fixture: Is it properly seated? Is it burnt out?
- Check the track head connection: Sometimes the connection to the track can be loose. Try re-seating it.
Flickering Lights
- Loose connection: Again, check if the track head is seated properly.
- Incompatible dimmer: If you’re using LEDs with an old dimmer, this is a common issue. You might need an LED-compatible dimmer switch.
- Faulty bulb/fixture: Sometimes a light simply goes bad.
By following these practical tips, you’ll not only illuminate your gallery wall beautifully but also ensure your track lighting system remains a functional and stylish asset to your home for years to come. Your art deserves to shine, and with adjustable track lights, it absolutely will.